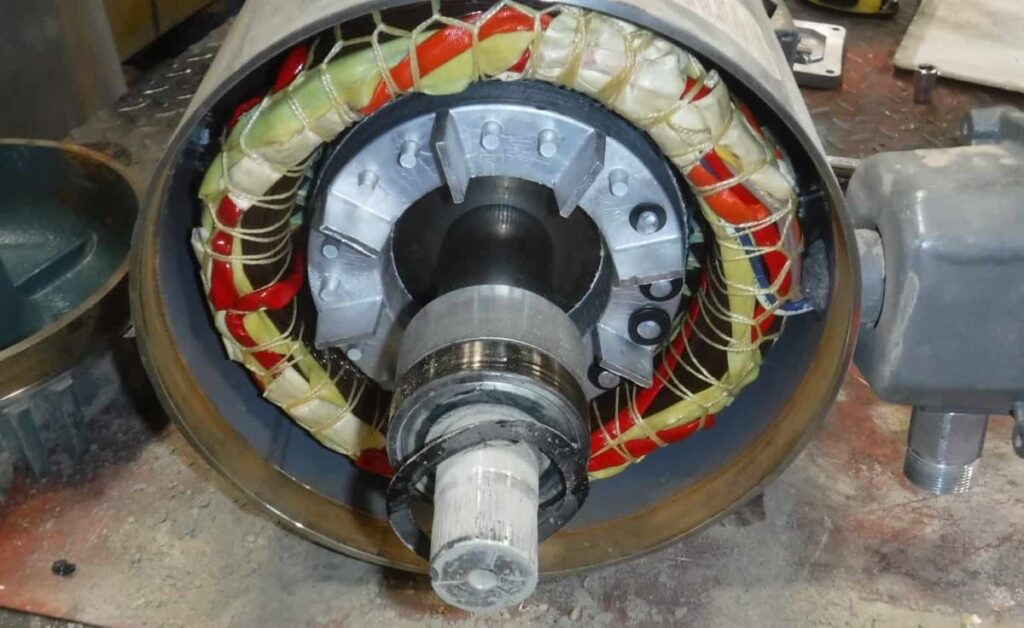
electric motor disassembly: removing the rotor from the stator
Analyzing electric motor test results, monitoring its temperature, and noise level is just a glimpse of what maybe is going on inside a motor. But nothing is more conclusive than to see the inside of the motor and do all the inspections, measurements, and tests.
Disassembling an electric motor is not rocket science. With some basic tools, knowledge, and a safe work ethic, you can do it yourself.
A professional motor technician can disassemble a motor fast but that’s because they have done it a million times. A beginner can disassemble the same motor slower but who cares as long as it is done right and the purpose is accomplished.
These are the steps in removing the rotor from the stator. Each will also be explained.
- If possible, test the motor first. This includes coil resistance, insulation resistance to ground, and test running the motor.
- If you have a dial indicator, measure the runout and end play of the shaft.
- Inspect the motor. Check for missing, loose, or broken parts.
- Remove any shaft attachment
- Remove the fan cover and the fan.
- Mark the end bell orientation so you can put it back the same way.
- Remove all the bolts fastening the end bells (end shield) to the stator
- Remove all bearing cap bolts from the end bells (end shield)
- If both end bells have back cap bolts remove the non-drive end (NDE) back cap bolts first
- Remove the NDE end bell.
- Remove the DE end bell and the rotor
Whether you want to replace the bearing, lubricate, investigate why it stalled or noisy, swap parts, or just want to see if it’s something you can fix, following these procedures in disassembling the motor will make your life easier.
In addition, I also included topics like;
- 8 ways to remove an end bell from the electric motor housing
- 5 steps in removing the rotor of an electric motor with a bearing retaining snap ring
- 11 steps to remove the rotor and end bell of a capacitor start single phase motor
- 13 steps to remove the rotor and end bell of a three-phase motor
- 9 steps in removing a heavier rotor out of the stator of an electric motor
1. Test the motor
When a motor arrives in a repair shop, the first question a technician asks is, is the motor grounded?
If you own the motor, you know what’s going on with it and your intentions of doing,
The bearings might be noisy, smoke came out of the motor, or the shaft of the motor seized, that’s why you are taking the motor apart.
In this case, testing the motor might be optional especially if you don’t have the necessary meters. Although it is better to have these test values for your record in case you have to replace it with a new one or you end up rewinding it.
Megger between the leads and the unpainted part of the motor. The reading should be ‘infinity’ if your meter is analog and 2 megohms or higher if it’s digital. If the reading is 1 megohm or lower, you might have some issues with the windings of the motor.
Measure the resistance between T1 & T2, T2 &T3, and T1&T3. The three readings should fairly be the same.
If your motor is a single-phase, the measured resistance between T1 & T4 must be lower than what you measured at T5 & T8.
2. Measure the runout and end play of the motor shaft
Runout is the movement of an electric motor shaft away from the true axis of rotation mainly due to a bent shaft or badly worn out bearing journal and/or housing.
End play is the amount of axial movement allowed by the motor’s construction to compensate for the thermal expansion of the shaft.
This is important on bigger machines in an industrial setting for proper transmission of motor torque to the load and also for efficient bearing operation.
If you have a small motor, measuring this is optional because your motor probably has a bearing wave washer anyway. Just make sure that the shaft is not badly bent.
But if you have a dial indicator, attach its base anywhere in the motor end bell where it will be stable and dial the shaft.
A deflection of more than 0.002 inches means that the shaft is bent and needs to be repaired.
3. Inspect your motor
Nothing is more surprising than finding out that your motor has a broken foot.
This is the time to check if your motor has missing bolts, dented fan cover, or any part that is broken.
Take note of each one because you can refer to them later during assembly.
This is also the best time to use your mobile device and start taking pictures.
- Take pictures of the motor parts that you inspected.
- Take pictures of the way the leads are connected in the terminal box
- Take a shot of every step you do in disassembling the motor.
- Picture of the nameplate. You might need the information in case the motor needs to be replaced or you found out that the motor needs rewinding. Remove any shaft attachment
4. Remove any shaft attachment
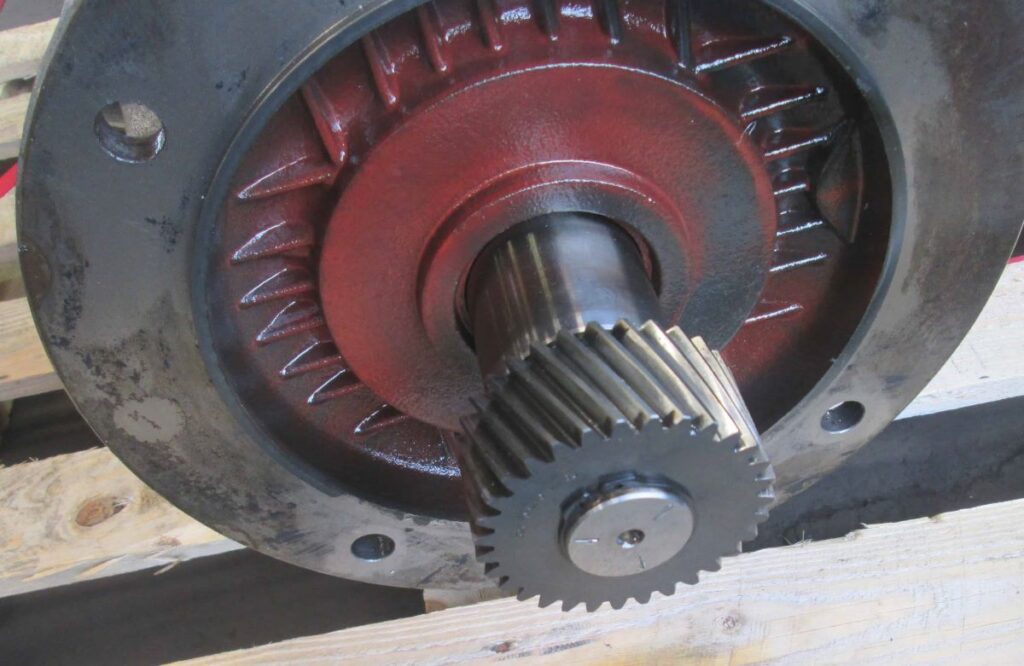
Some motors have a sheave or some kind of attachment on the shaft. Remove it first, especially if the bearings of the motor will be replaced.
Check the post, “How to remove a coupling, mounted gear, or pulley (sheave) from the shaft”
The basic tools you need to remove the attachment will be a bearing puller, a wrench, an Allen key if the attachment has a set screw, a snap ring remover if the gear is held by a snap ring, and a propane torch or oxy-acetylene torch in case it is tight.
Always measure the distance of the sheave from the end of the shaft so that you can put it back the same way.
If you have to use heat to remove the sheave, wear your safety glasses and protective gloves
Take pictures.
5. Remove the fan cover and the fan
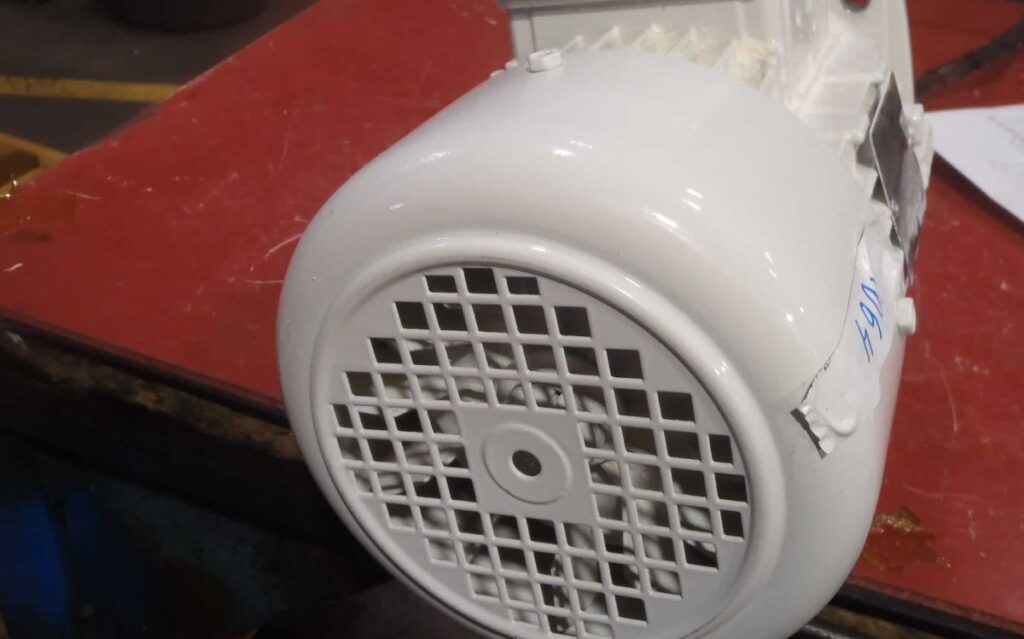
Not all electric motors have an external fan. Most totally enclosed motors have it and removing them can be straightforward.
Remove first the fan cover by undoing the bolts.
Cooling fans come in types and sizes. Check the post titled “Ways of removing the fan of an electric motor”.
The basic tool you need will be a pair of pry bars to remove the fan and depending on how the fan is held in the shaft, you might need a screwdriver, a snap ring remover, and a small socket wrench, or an Allen key.
6. Mark the end-bell (also called end shield, end cap, or end bracket) to the stator orientation
The Drive End (DE) of an electric motor refers to the end of the motor where the shaft drives the load.
The drive end shaft has load attachments which could be a sheave, a pulley, a gear, a coupling, or a blower fan.
The Non-Drive End (NDE) of an electric motor also called Opposite Drive End (ODE) refers to the end where the cooling fan of the motor is located. This is the end of the motor opposite the drive end
Most open drip motors don’t have a cooling fan or even a non-drive end shaft extension and so it’s closed but regardless, that end is called a non-drive end.
The end bell which is also called an end shield, end cap, or end bracket, is a part of the motor that covers both ends of a stator.
End bell also houses the bearings that support the rotor through the shaft called bearing housing. It helps to maintain the distance of the rotor to the stator core. This distance is called an air gap.
Reasons why electric motor stator and end bells are marked
- The end bell to the stator must be marked because the stator core is not always in the middle of the stator housing which means if the rotor is installed backward, it will not be aligned with the stator resulting in the motor drawing a high current.
- Putting the drive-end shaft to the non-drive end of the stator will also position the J-box (also called connection box, terminal box, or peckerhead) of the motor on the wrong side.
- Installing the end bells upside down will put the grease nipples and sometimes the vent holes in the wrong spot.
- The end bell and the stator are marked so that they can be assembled back the same way as it was. These are the ways the end bell and the stator are marked.
3 ways of marking the stator and end bell orientation
- One punch mark on the non-drive end and two punch marks on the drive-end side
- Two punch marks on the non-drive end and three punch marks on the drive-end side which we always do at the shop.
- N letter punch mark on the non-drive end and D letter punch mark on the drive-end side
A paint marker is not advisable since it can come off anytime the parts are washed or cleaned with solvents.
Electric motors can have a double shaft like for example a shaker motor where both shaft extensions have the same diameter. In this case, it doesn’t matter which end is assigned as the drive end as long as they are marked.
7. Remove all the bolts fastening the end bells (end shield or end cap) to the stator.
There are different ways the end bells, also called end shields or end caps, are secured to the stator housing.
- End bells directly bolted to the housing
- Using through-bolts passing through inside the stator
- Using through-bolts passing through outside the stator
Sometimes the bolts on one end are longer than the other. Take note of this so that you can put the proper bolt to where it is supposed to be.
Through bolts are also installed so that the nuts are on the drive-end side of the motor. Some manufacturers do this for a reason so put them back the same way.
Some bolts can be super rusty so it would help if you soak it first with an oil penetrant.
Use a parts bin so you won’t lose any parts. Be organized.
8. Removing bearing cap bolts from the end bells (end shield)
A bearing cap also called a bearing back cap, is a restraining plate installed at the back and sometimes at the back and in front of a bearing of an electric motor to ‘locate’ one end of the shaft while providing sufficient room in the other end for thermal expansion of the shaft.
The bearing cap ‘locates’ or held the bearing captive in the housing (usually the DE) to prevent axial displacement or movement of the coupling.
If there is a bearing cap you will not be able to remove the end bell from the shaft not until you remove the bearing cap first.
Two bolts on the end bell close to the shaft are an Indication that there is a bearing cap.
Sometimes both the DE and NDE end-bell have a bearing cap.
The bearing is locked in place on some motors using an internal snap ring right at the bearing housing.
The internal snap ring locking the bearing to the end bell can only be accessed once the rotor with the end bell still attached to it is removed from the stator
Some smaller motors have a bearing retaining ear instead of a back cap or snap ring to hold the bearing in place. Like the end-bell with the bearing held by a snap ring, it is easier to separate the endbell from the rotor if they are out of the stator.
9. If both end bells have back cap bolts, remove the non-drive end (NDE) back cap bolts first
There are advantages to removing the NDE bearing cap first although to some it doesn’t matter.
First is if you remove the NDE end-bell and the bearing housing fit is snug, the rotor will come with it which is annoying on bigger motors especially if you have to remove the rotor using a lift later.
Second, if the motor has an internal fan, it can be either on the drive end or the non-drive end of the shaft.
If the rotor comes with the endbell when you remove it, the internal fan will hit and can damage the windings of the motor.
10. Removing the NDE end bell also called end shield or the end cap.
End Bells are still held in two spots even after all the bolts are removed. One is on the stator rim and the other on the bearing. If the endbell clears these two, then it’s off the stator.
The usual way of removing it is by using a pry bar. On a very small motor, two flat screwdrivers are enough.
When prying the end bell, make sure to keep the tip of the pry bar from touching and damaging the windings.
8 ways to remove an end bell from the electric motor housing
- Some motors have an opening notch between the end bell and the stator to accommodate the pry bar to pry an end bell off.
- Some motors have cooling fins. Use the gaps between the stator and the end bell fins to pry and separate the two.
- End bells have ears to accommodate the bolts. Tap this ear to rotate and be aligned with the feet of the motor or the fins of the stator and pry it from there
- Another way is to use a dull chisel or a flat steel drift to tap and separate the end bell from the stator. Once an opening is made and the pry bar can fit, start prying the end bell out.
- On smaller motors that don’t have a back cap, you can tap the shaft using a dead blow hammer in the direction of the end bell you want to remove. The dead blow hammer is made of polymer plastic and it will not damage the shaft.
- Use a steel hammer and a piece of wood to protect the shaft if a dead blow hammer or any kind of mallet is not available
- On smaller motors, if you remove the end bell and the rotor comes with it, that’s fine but make sure that there’s no internal fan on the other end. Or else you will be damaging the windings.
- Some end bells are hard to remove especially when the bearing is seized inside the bearing housing. You can use a three-jaw puller for this job
Take your time.
11. Removing the DE end bell and the rotor of an electric motor
The rotor of an electric motor can be removed with the end bell still attached to it or without it.
The end-bell is removed first on bigger motors because a longer shaft extension is needed as leverage to remove the rotor out of the stator.
On smaller motors, if you remove the end bell and the rotor comes with it, that’s fine because there could be a snap ring holding the bearing inside the housing.
5 steps in removing the rotor and the end bell (end cap) of an electric motor with a bearing retaining snap ring
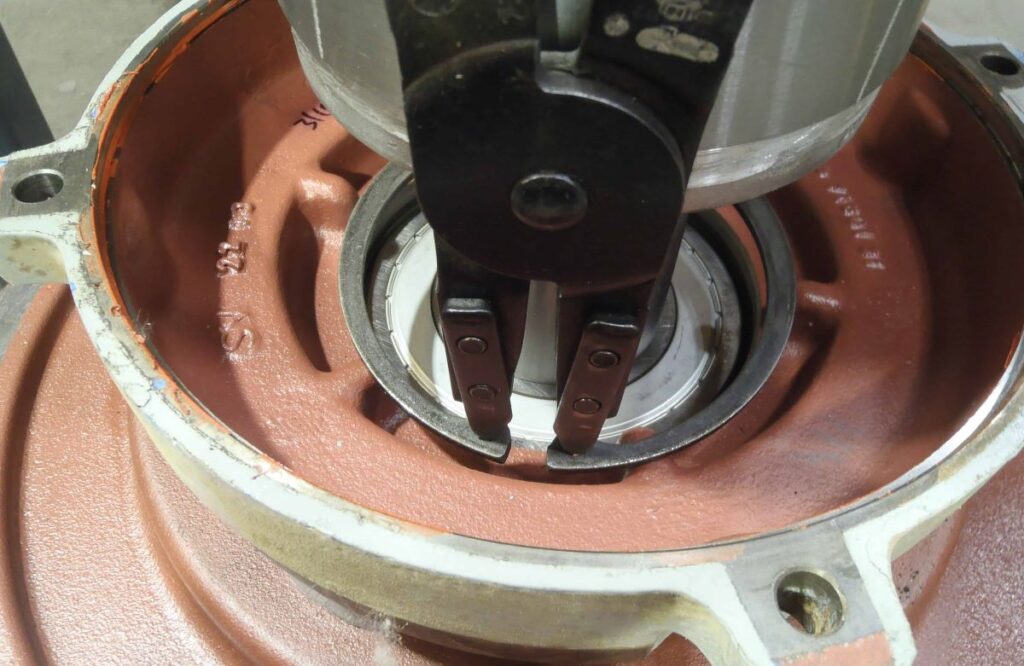
Electric motors can have an internal snap ring inside the housing of the DE bearing instead of a back cap.
Bearings are held in place so that end play is minimized. Most roller motors have this as well as gearbox motors where the shaft cannot move back and forth.
- Separate the end bell from the stator prying or tapping the other end of the shaft. See “5 Ways to remove an end bell from electric motor housing “
- Once an opening is created, grab the top of the end bell with one hand and the shaft with the other and slowly remove the rotor out of the stator. Avoid hitting the windings.
- Place the rotor upside down on a vise or similar stand.
- Using a suitable size of internal snap ring plier, remove the snap ring.
- Set the rotor on a piece of wood to protect the shaft and tap the end bell all the way around using a mallet until it separates from the rotor.
11 steps to remove the rotor and end bell of a capacitor start single phase motor
When removing the rotor and the end bell of single-phase motors, there are connection wires of the centrifugal switch that needs to be taken care of.
Some enclosed motors also have an internal fan opposite the centrifugal switch that you should mind.
Also, most centrifugal switches are on the non-drive end of the motor. Here is how you do it.
- Remove all the through bolts and the fan if there are.
- On a motor with a closed non-drive end (NDE) end bell, tap the drive end (DE) shaft with a mallet just enough for the NDE end bell to separate from the stator.
- Using two pry bars or bigger flat screwdrivers, remove the end bell.
- Using a needle nose or a long nose plier reach for the wire connectors and remove them from the switch.
- Remove the NDE end bell.
- Tap the shaft going the opposite way which is DE.
- As soon as the end bell separates from the stator, grab the end bell with one hand and the shaft with the other and slowly remove the rotor.
- On motors with an outside fan, most of the time you can just tap the NDE shaft using a drift or center punch until the fan, the rotor, and the DE end bell all separate from the stator.
- Remove the rotor with the DE end bell still on it
- In the process of removing the rotor, be careful not to bump the rotary switch to anything to avoid damage.
- Then pry off the NDE end bell and remove the wiring connectors.
13 steps to remove the rotor and end bell (end cap) of a three-phase motor
- Remove the fan covers and the fan of the motor.
- Put punch marks on the end bells and the stator
- Remove all the bolts securing the end bells
- Remove the NDE end bell. See “5 Ways to remove an end bell from electric motor housing “
- If the rotor comes out with the end bell, that’s fine, slowly pull the end bell until the rotor is halfway off the stator
- Grab the rotor with one hand and the end-bell with the other and slowly remove it from the stator.
- Pry the other end bell off.
- If the NDE end bell comes off by itself, the next is to pry off the DE end bell. Again if the rotor comes with it, that’s fine. Slowly remove them from the stator.
- Put the rotor with the end bell upside down on top of a block of wood and tap the end bell with a mallet until it separates.
- Another way is while the rotor with the end bell is upside down on a block of wood, lift it then let it drop on the wood. The end bell should drop down.
- On a larger motor with a heavier rotor, the end bell should come off when you pry it.
- If the rotor is too heavy to manhandle, and your intention is just to replace the bearing, don’t remove the rotor. Remove and replace the bearing with the rotor on the stator then assemble it back together
- If you have to remove the rotor, follow the steps in removing a heavier rotor out of the stator.
9 steps in removing a heavier rotor out of the stator
The rotor of a bigger motor, say between 25 HP to 100 HP motor might not be safe to remove from the stator even with two persons without a crane.
Some shops use a rotor lifting device to remove big rotors out of the stator.
If you have a chain hoist or a chain block handy, you can safely remove the rotor yourself. If the rotor is too heavy, you need them to support the weight of the rotor while removing it.
A hydraulic engine hoist or lift also will work.
- Holding the DE shaft extension, pull the rotor out of the stator about a third out
- With a sling rated at 3600 lbs. minimum, put a chokehold on the rotor
- Using a chain hoist, lift the rotor until the weight is off the stator
- Pull the rotor again until the haft of the rotor is out of the stator.
- Let go of the chain hoist making sure the rotor is not touching the windings of the motor
- Adjust the sling further to about a third the length of the rotor.
- Lift the rotor again using the chain hoist until the weight is off the stator
- While putting downward pressure on the shaft extension, slowly pull the rotor out of the stator. Keep the rotor from touching the windings.
- If you need more leverage, insert a longer steel pipe on the shaft extension then put downward pressure on the pipe
Wear your safety shoes!
Conclusion:
Do you have a motor that you want to disassemble but are intimidated by the size or worry that you won’t be able to do it? You don’t have anything to lose so I would say go for it.
If you’re not successful you can always bring all the parts you disassembled to a shop and fix it for you.
It’s worth the try. Take lots of pictures. Work safe.
electric motor disassembly: removing the rotor from the stator Read More »

